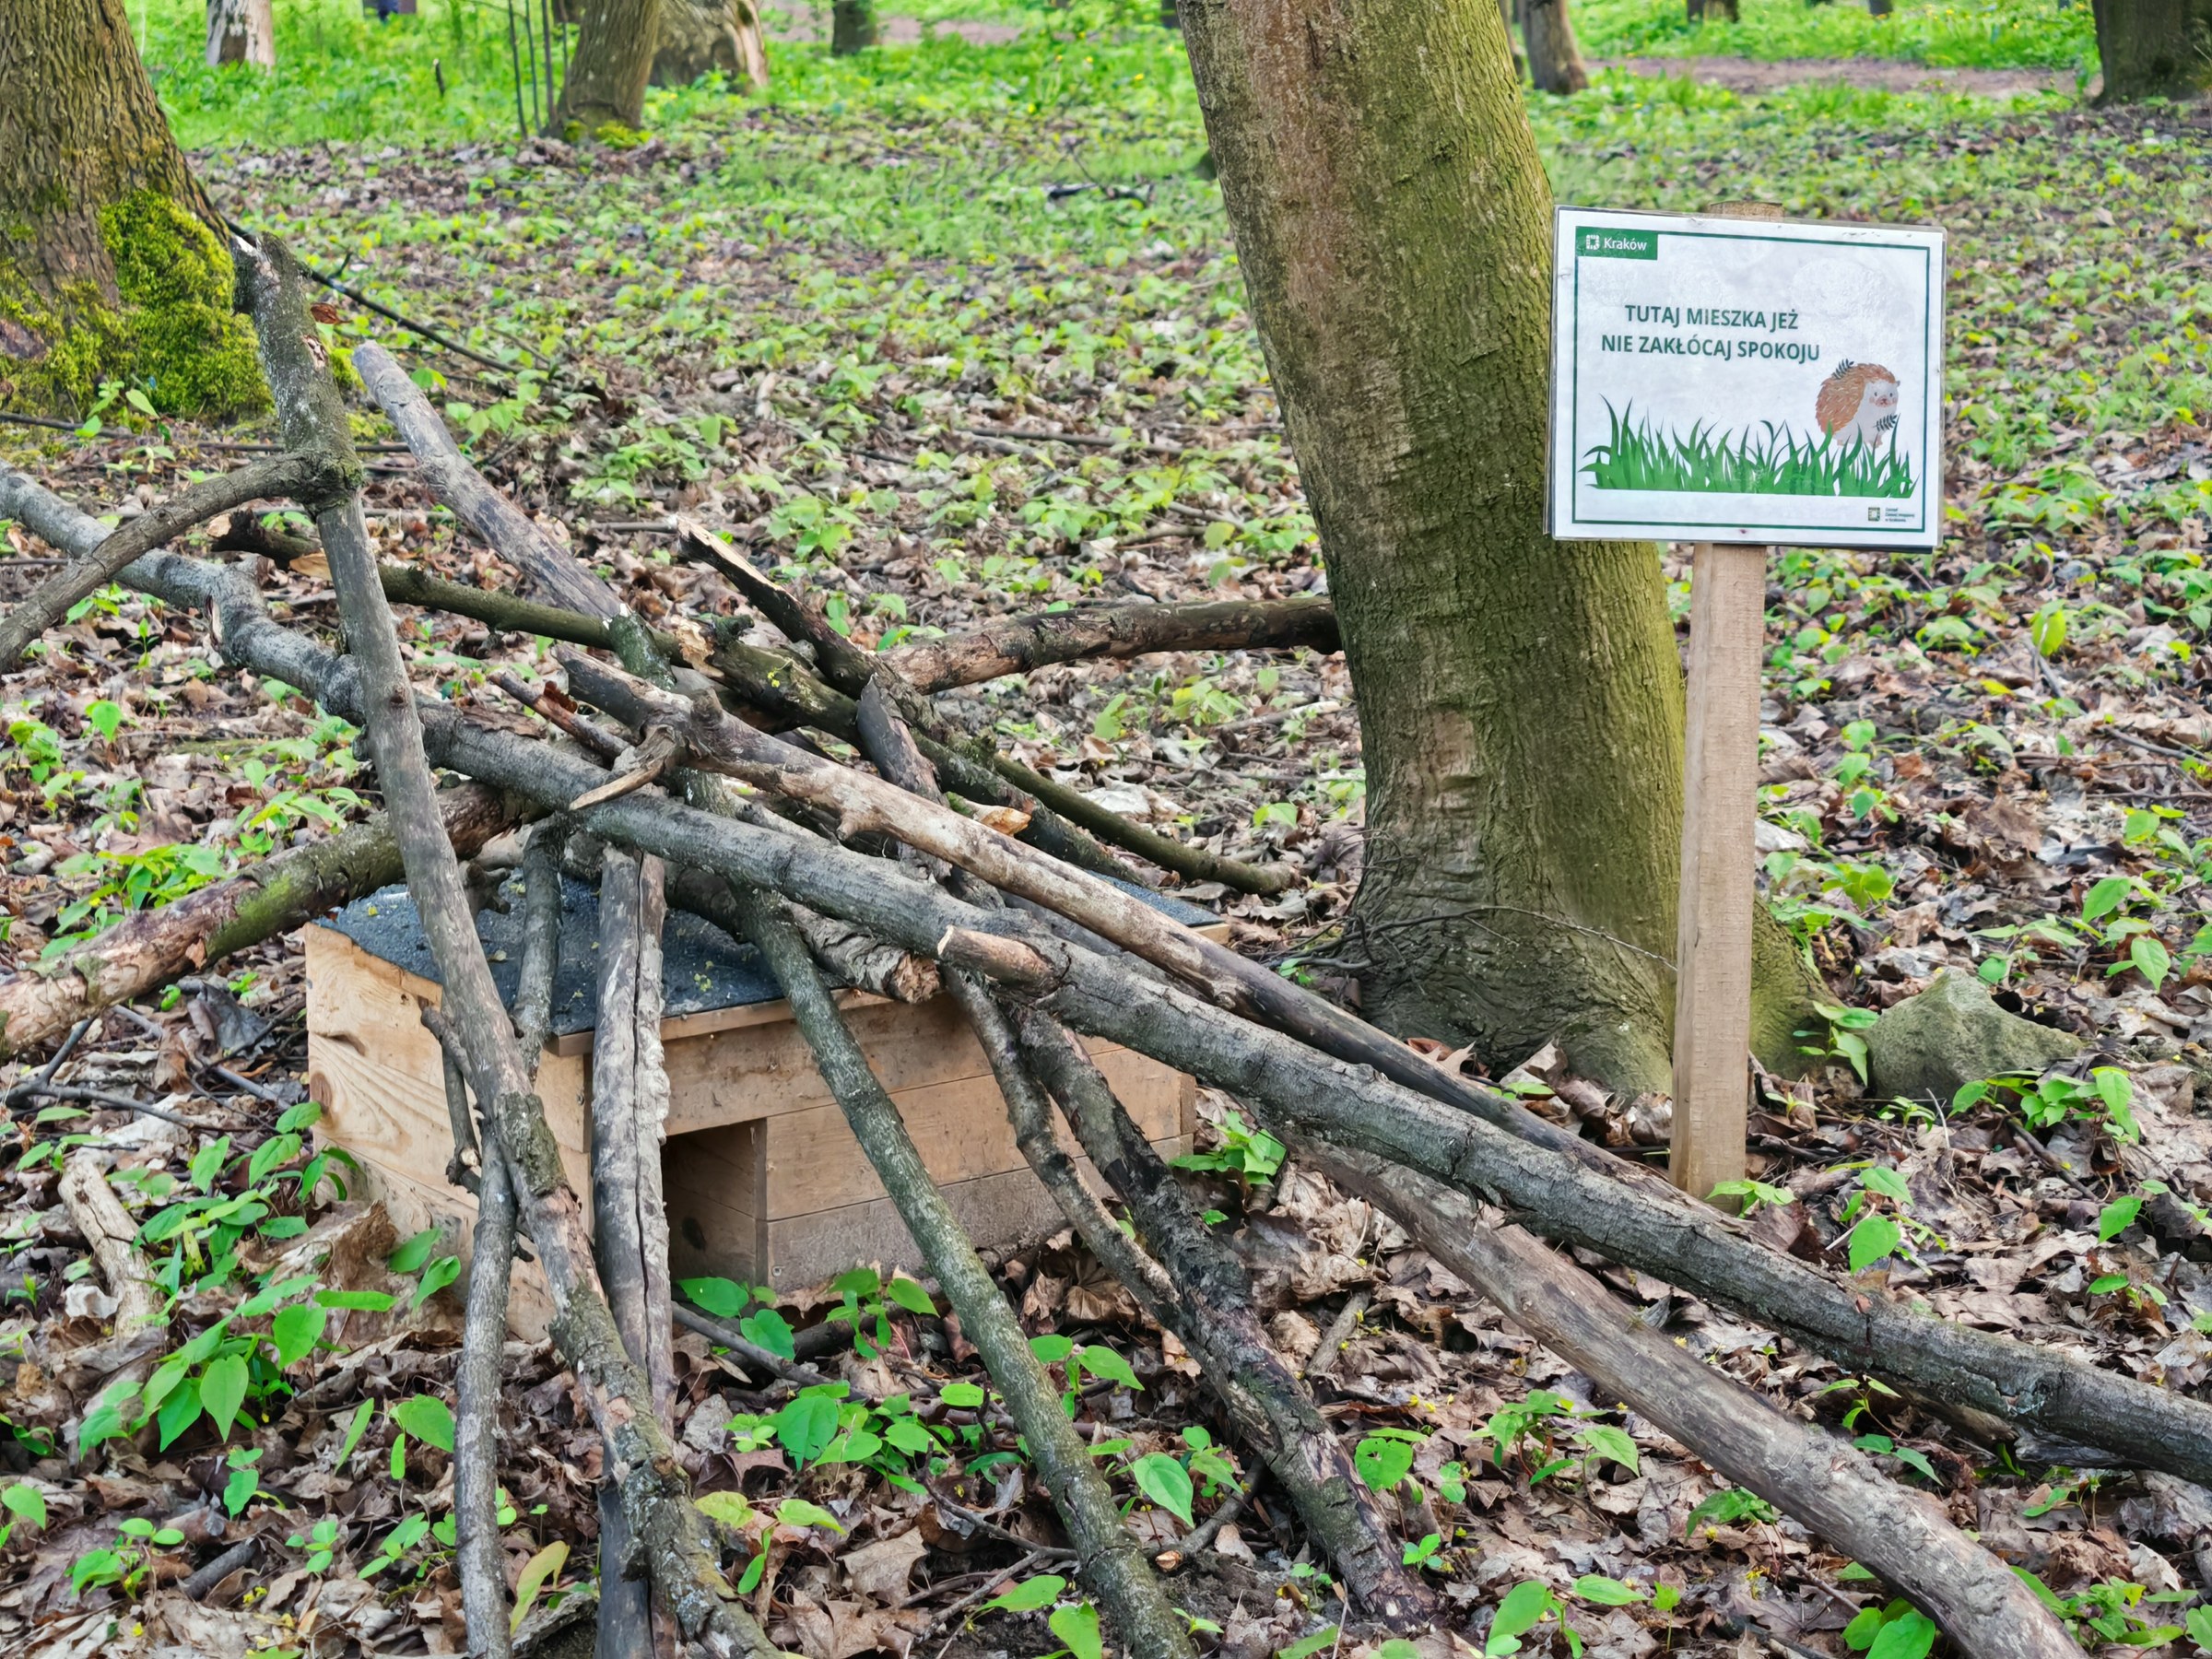
For a quick UK garden shelter, turn a sturdy, ventilated storage box upside down, cut a 13 × 13 cm entrance, add dry leaves and cover it in a quiet spot. If you want a longer-lasting wooden house, use a solid box with a removable roof and an entrance tunnel. Both approaches appear in Hedgehog Street’s 2025 house guide. A house offers another possible nest site; it cannot guarantee that a hedgehog will use your garden.
What should you gather before building?
Choose one build and gather its materials before cutting:
Quick box: a sturdy plastic storage box, planter or milk crate with ventilation holes; a cutting tool; gloves; dry leaves or pet straw; and loose cover such as leaves or logs.
Wooden house: untreated timber, a saw, screws, a drill, sandpaper, battens for a lift-off lid and bricks or wood for an entrance tunnel.
Avoid creosote and non-water-based preservatives. The British Hedgehog Preservation Society’s house advice says their fumes can harm hedgehogs.
How do you make the quick box version?
Check that the box is sound and already has breathing holes. Add ventilation holes if needed.
Turn it upside down and cut a 13 × 13 cm doorway at ground level. Smooth the cut edge and remove any sharp pieces.
Put dry leaves or pet straw beneath the shelter. Leave more dry leaves nearby so a visitor can arrange its own bedding.
Set the box on level ground in a sheltered place. Cover it with leaves, soil or grass cuttings for camouflage, but keep the entrance and ventilation clear and make sure the cover cannot shift onto the opening.
Build and cut the box away from wildlife, then put the finished house into position.
How do you build the wooden version?
Hedgehog Street’s measured plan uses a 40 × 30 cm base and lid, 40 × 30 cm front and back, two 26 × 30 cm side panels and a 13 × 13 cm entrance. Check the illustrated cutting plan before sawing; adjust the side pieces if your timber thickness differs.
Cut the panels and doorway, then sand rough edges. Screw the four walls together on the base, leaving no exposed sharp fixings inside.
At the doorway, make an external tunnel from two stable rows of bricks and a secure roof piece, leaving the passage clear. An internal wooden baffle is an alternative. Either design should stop a cat reaching straight into the sleeping chamber.
Fit a roof that lifts off for future cleaning but cannot slide out of place; use battens to hold it. Check that rain cannot run into the sleeping chamber. Do not nail the roof shut.
Put a little dry leaf litter or pet straw inside and leave extra dry leaves outside. Position the completed house as described below.
Do not nail down the roof as you may want to clean the box in the future
If you would rather build with bricks and a sheet of wood, the Natural History Museum’s brick-house guide shows a separate method.
Build our GroundFeeders hedgehog house
Our own hedgehog house design has a compact internal entrance passage, a separate sleeping area and a removable roof for access when the house is unoccupied. We’ve put the project into a free printable guide, with a measured cutting layout, a labelled cut list and an exploded assembly diagram to show how the pieces fit together. See the full GroundFeeders build article for the cut list and assembly sequence.
FREE HEDGEHOG HOUSE BUILD GUIDE
Take the plans into your workshop.
Download our six-page guide for the cutting measurements, assembly instructions, roof details and advice on positioning and caring for your hedgehog house.
Where should you place the house?
Choose a quiet, dry, shady, sheltered spot near a hedge, fence or wall. Keep it away from busy paths and aim the doorway away from north and north-east winds, as the British Hedgehog Preservation Society advises. Leave the surrounding cover undisturbed after installation. Check that a hedgehog can actually enter the garden: a house behind a continuous fence is of little use. The Natural History Museum describes a gap under a fence or wall as a hedgehog highway; seek a neighbour’s agreement before altering a shared boundary.
Keep food away from the sleeping house
Do not place food or water inside the shelter. If you offer either in the garden, put it a little way from the house so the nest does not attract other animals. This applies to both box and wooden designs.
When should you clean it?
First make sure the house is unoccupied. The British Hedgehog Preservation Society suggests late March or early April as a possible time after winter use, but a hedgehog may remain in residence and a female may later rear young there. Watch from outside before approaching; a light twig across the entrance can show a visit if moved, but an unmoved twig does not prove the house is empty. If a hedgehog is present or you are unsure, leave the house alone. When you can confirm it is empty, remove old bedding and scrub the interior with hot water. Let it dry before leaving fresh dry leaves nearby.
What if no hedgehog moves in?
Give the shelter time and avoid opening it repeatedly. Check that the entrance is clear, the site stays dry and quiet, and hedgehogs have a route into the garden. A house is only one option: the Natural History Museum also suggests leaving a quiet pile of logs and leaves where a hedgehog could make its own nest.
Related reading: How to attract hedgehogs to your garden safely; What Does a Hedgehog Nest Look Like? UK Guide.
Sources & further reading
Hedgehog Street. “Give a ’hog a home”, updated September 2025. Checked 27 September 2026 — https://www.hedgehogstreet.org/wp-content/uploads/2025/09/Hedgehog-houses-updated-2025.pdf
British Hedgehog Preservation Society. “Hedgehog Homes”, undated. Checked 27 September 2026 — https://www.britishhedgehogs.org.uk/hedgehog-homes/
Natural History Museum, Emily Osterloff. “How to make a hedgehog house”, undated. Checked 27 September 2026 — https://www.nhm.ac.uk/discover/how-to-make-a-hedgehog-house.html